


Compost Bin Plans
Materials I Used to Construct The Compost Bins:
Step 1: Constructing the posts for the Compost Bins
I’ve a set of plans for this bigger dimension I made myself however I even have a set of plans that’s smaller. Since I dwell on land and have an enormous backyard, I needed the additional capability. I’m putting this proper outdoors my backyard, subsequent to a potting shed I constructed a couple of years in the past. I’m going to skip digging holes as a result of that’s normal follow however know there are 8 wanted for this construct and a 4×4 could be positioned in every one. The again posts are merely reduce to dimension, then plopped of their spot.
The entrance ones, have a middle channel that runs many of the means down. These are what make the entrance slats adjustable. To chop these in, I am going to the desk noticed. A trick to slicing within the channel simply is to arrange two fences. I make my first cross by utilizing the desk noticed fence which is ready as much as set up the far proper boundary of the channel.
On my second cross, I take advantage of a scrap straight board that’s aligned to the left of the wanted channel. One other scrap is positioned on the outfeed desk to ascertain the depth of the channel. When it comes time to run the third cross, I don’t use both fence, however as a substitute float my 4×4 in between the 2 to filter out as a lot of the middle as I can.
Don’t fear should you don’t get all of it although, a chisel can do the remainder of the clear up work. Usually when working with a chisel, you wish to use the massive flat portion to maneuver alongside the wooden. Nevertheless, in conditions like these the place the deal with prevents you from getting down flat, know you may flip it over and use this small bevel as a substitute. It’s a smaller floor space so it’s more durable to maintain flat, however simply place a finger or two down on it to assist.

Step 2: Getting ready the Posts to be Positioned within the Floor
Okay, with the channels made, lets put these posts of their place within the entrance line up. With posts going within the floor, be sure to’re utilizing stress handled wooden. In actual fact, I like to recommend utilizing Prowood which even has labeling that can assist you select the proper handled materials on your particular venture. For my posts, I made positive to seek out the label that mentioned “floor contact”.
One in every of my favourite issues about Prowood is that they use the newest development in stress handled lumber to paint deal with their wooden! So as a substitute of the usual inexperienced tone, now you can select from quite a lot of colours and skip the staining step. The wooden is shade infused so pigment is pushed deep into the wooden fibers that’s warrantied to face as much as the weather for years
Step 3: Putting the Posts within the Floor
Let’s transfer on to setting these posts within the floor. I didn’t really feel like messing with concrete so for this venture I used decomposed granite instead. These items could be discovered bagged within the backyard part. On each submit, I fill the outlet up about 1/3 of the way in which, then I tamp it down, aka compact it.
To get it began I want to make use of a brief scrap and I selected a 1x so I can match into the tight spots across the posts. I’m going for sufficient compaction to maintain the submit from leaning a ton in order that I’ve each arms to position a stage on one facet of the submit and push it into plumb. As soon as I’ve it there, I compress extra, then repeat on the opposite face of the identical submit. After getting it excellent, I replenish the outlet additional then actually attempt my greatest to compact it tight.
I’ve a rock bar, as a result of everyone within the hill nation does, and it truly comes with a 2” spherical tamp on one finish, in order that’s what I take advantage of.
I like to recommend you begin with an finish, then hop down the road to set the opposite finish submit, then knock out the in betweens. Greater than ensuring every submit is plumb on two faces, you additionally wish to be sure the faces are sq. to 1 one other, I’m utilizing that lengthy 1×4 to check this.

Step 4: Leveling the Posts
Subsequent I made all of the compost bin posts stage to one another. To do that, I discovered the peak of the shortest submit, then reduce the highest off the others posts to match it. I did this with two passes utilizing a round noticed. That is faaaaar simpler than attempting to get all 8 holes precisely to the identical depth.
Whereas I used to be slicing, I reduce in a shoulder on all 4 of the again posts. Be watchful as a result of should you transfer round a submit as a lot as I did right here, you’lI completely need to replumb it. A great tip is to don’t be too fear about completely plumb till now, simply get it shut, as a result of the following step is so as to add a 2×4 that reaches throughout all 4 of those again posts to safe them collectively.
At this level I made positive the posts have been completely plumb then I might tamp away and compact it as a lot as I might.

Step 5: Including Screening to the Compost Bin
Go forward and take your time on setting these posts as a result of if they’re plumb and sq., then it’s going to make every part else from right here fly. The subsequent step is to decorate off the again of the compost bin. There are a couple of choices you possibly can go along with for screening however I like to recommend {hardware} fabric. I’m utilizing a crown stapler to pin it into place, attempting to work out the bubbles as I am going. I pin it in just some locations to carry it down, then as soon as I don’t have to carry it any longer, I am going again and totally connect it. I think about there might be a good quantity of stress as soon as these compost bins are full.
To chop {hardware} fabric you may completely use a pair of facet cutters however a a lot sooner means is to make use of a proper angle grinder with a reduce off wheel. Don’t fear should you get into the wooden a bit.

Step 6: Chopping Railings for the Compost Bin
At this level I am going again to my store and reduce some rails that may span from the again posts to the entrance ones. I take advantage of my bandsaw to chop in two completely different shapes on one finish of those items. The T’s might be positioned within the middle, whereas the Ls might be positioned on the surface. On all of those, I begin by attaching the again of the rail to the again submit. After I transfer to connect the entrance, I transfer the rail in or out with my knee. Issues ought to be plumb at this level, however every one was barely off. No drawback although, After pinning it in entrance, I might as soon as once more tamp down the granite.

Step 7: {Hardware} Material for the Compost Stalls
With these rails in place you may see the form of every stall showing. To finish it, I wall it in utilizing {hardware} fabric on all the within faces. These are roughly reduce to dimension first to make dealing with them just a little bit simpler, however as soon as I begin pinning them, I allow them to run lengthy on the entrance as a result of it’s simple to trim completely to size after. In actual fact, when you have a buddy round, have them seize a pair of sq. nostril pliers and pull the {hardware} fabric tight when you safe it. That is most helpful on the entrance dwelling stretch.
Notice: that this air hole in between every stall is intentional. Airflow is a giant contributor to a wholesome compost pile that gained’t stink. If you happen to do compost proper, which incorporates air movement annnd a steadiness of brown and inexperienced layers, then odor shouldn’t be a problem.

Step 8: Walling off the Entrance of the Compost Bin
Alright, lets wall off the entrance. To maintain the underside slat from resting on the bottom, I ran in a screw to intrude with the observe on the 4x4s. This implies, I can now feed in slats as tall or as little as I need for every stall. I’ll in all probability depart all of them excessive whereas filling and letting the compost prepare dinner, however will probably be very helpful to take off slats as I’m eradicating the compost to be used.
Notice: handled wooden vs. non-treated wooden
should you’re fearful about utilizing handled wooden round compost know that the primary ingredient in Prowood stress handled lumber is definitely copper, which is utilized in frying pans and even water strains. The technical identify is Micronized Copper azole which nonetheless makes the wooden termite and fungal resistant however means you should utilize it on meals prep surfaces. It additionally means different advantages prefer it’s extra pure trying, much less corrosive to fasteners, and shade handled boards will outlast cedar and redwood boards, arms down.

Step 9: Defending the Compost Bin by Including Lids
Okay one final part and this compost bin venture might be a wrap, with the intention to hold animals out, subsequent I constructed some lids. These are fairly easy development with some 2x2s and extra {hardware} fabric. I constructed these inside my store as a result of it’s means simpler to do on a big floor than on the bottom.
I began by attaching the material to one of many 2x2s, then flipped it over and connected the lengthy facet to this brief facet. Then simply repeated on the remaining two sides. Once more, going for air movement however a no critter zone.
To connect them to the compost bin, I began by screwing on a couple of hinges to the again of the physique. Then I set the lid in place, lined it as much as this hinge then secured it with screws. Regardless on how lengthy you may have the entrance wall, this lid will shut down however lets go forward and set up all of the slats and have a look.
You’ll be able to completely depart it as is however I put in a easy string attachment with a small weight with the intention to make decreasing the doorways just a little simpler. And also you’re finished! You’ve constructed your individual compost bin!

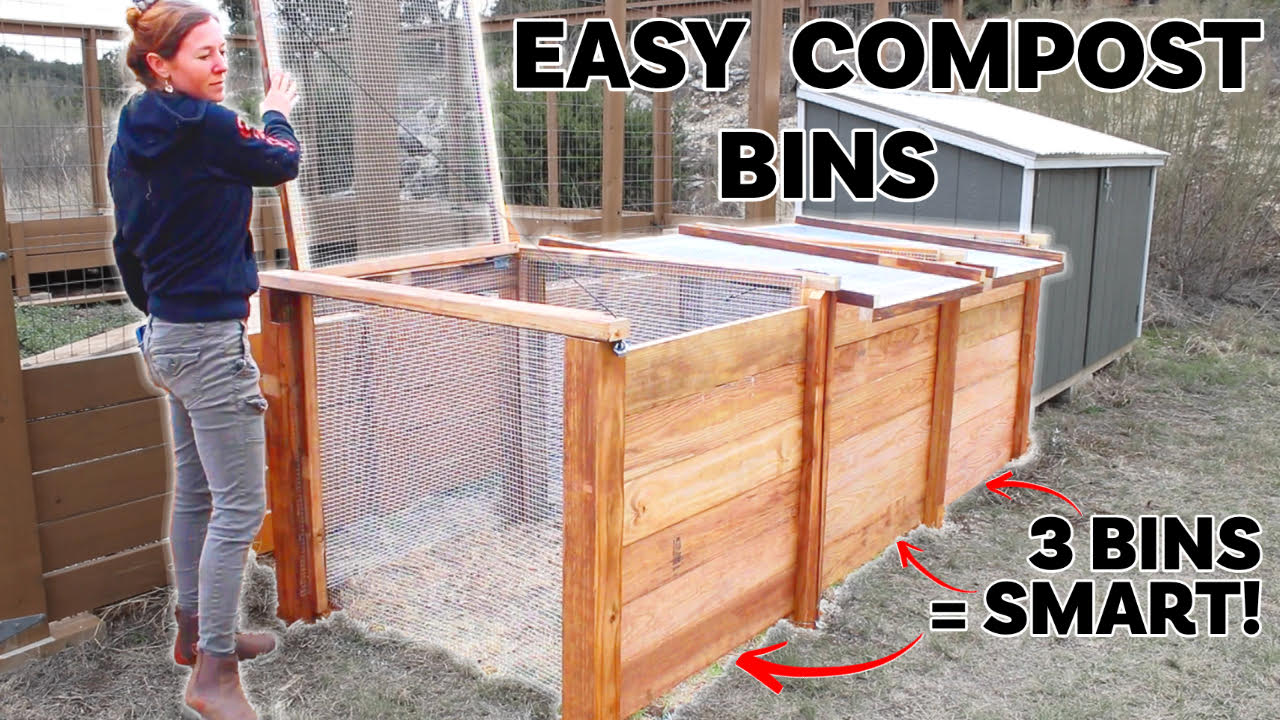
I’m simply now moving into composting so I do know I don’t know a lot, however I feel this three part compost bin rock! There are three bays as a result of there are three levels of composting. I’ll all the time have one which I’m filling, one that’s within the cooking stage, then one which might be prepared to make use of compost. It will likely be shut to 2 years earlier than I’ve this third prepared to make use of however as soon as I make investments the time, I ought to all the time have a stall rotating into use.
The entrance wall is tremendous simple to decrease, or increase relying on the duty that’s wanted, the lids will hold animals out however allows moisture and airflow, and in contrast to compost strategies that require tumbling, I’ll be capable of layer up inexperienced and brown issues to let sit till prepared. It’s an excellent low upkeep compost bin.
****Keep in mind I’ve a set of compost bin plans if you want to construct your individual. I’ve this set which is giant, but additionally the identical design on a smaller scale. You too can go to prowoodlumber.com and discover out the place to purchase Prowood on your subsequent construct. **** I’ll see you on my subsequent venture!
Extra Issues I Used on this Construct